

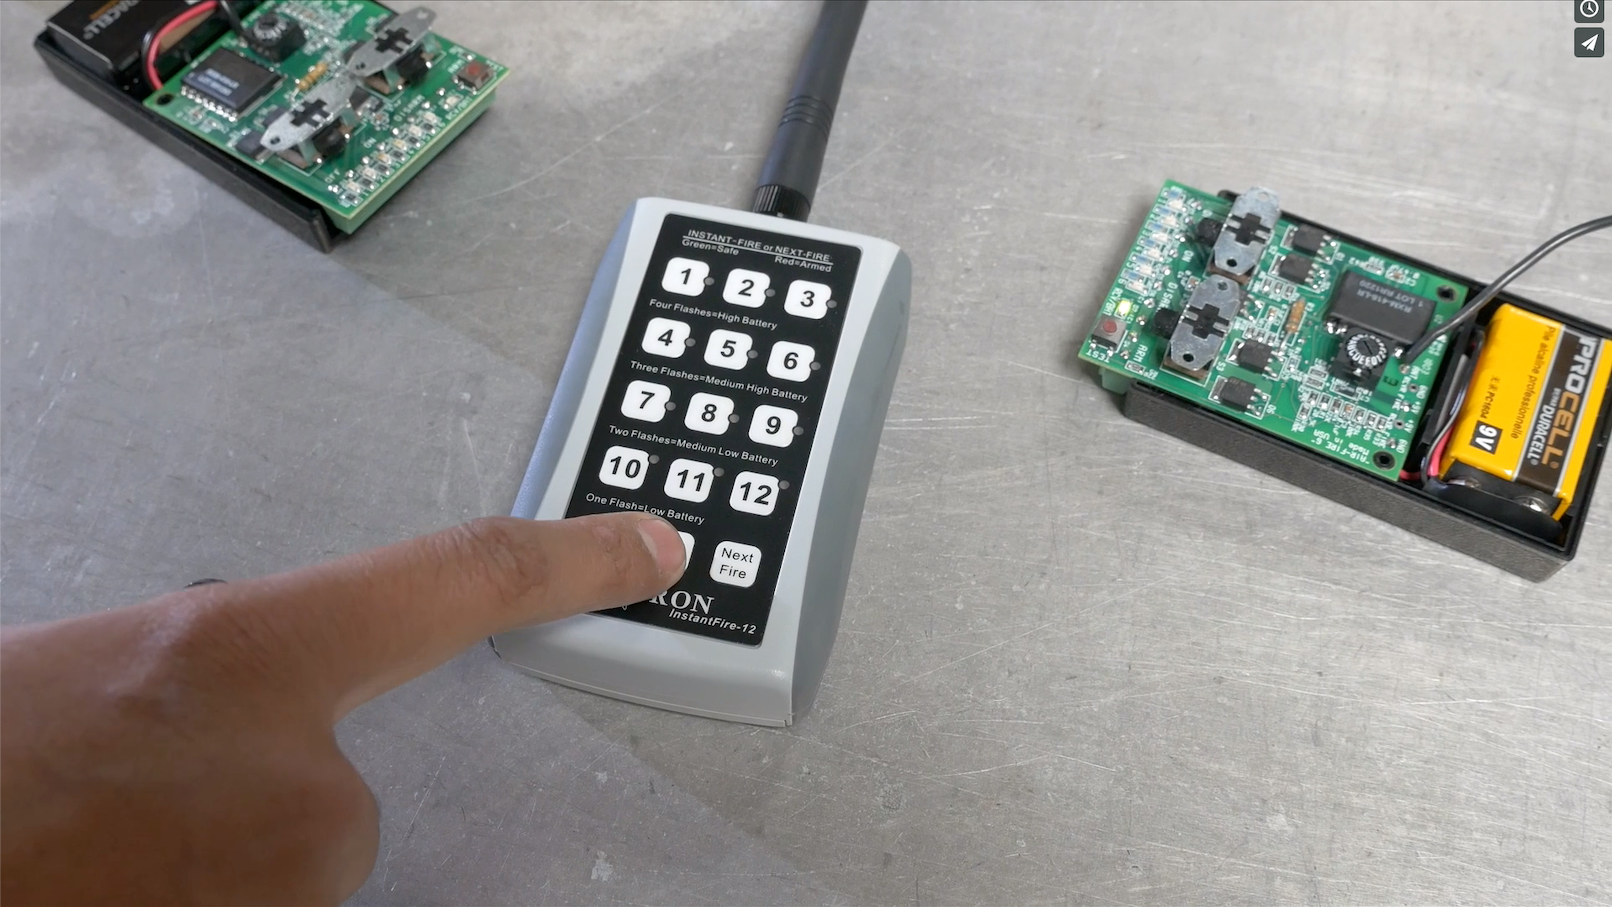
Need some help pairing your InstantFire-12B with two Holatron receivers? Here are the instructions in plain english.
The first thing to do is watch the video Holatron 12 shot pairing instructions located at the bottom of the InstantFire-12B product page. The video will give you an overview of the pairing process. You’ll also get to see in detail the operations you’ll need to execute to pair your InstantFire 12B Transmitter with two 6-Shot Receivers.
Let’s get started.
SET THE CHANNEL ON THE TRANSMITTERThe first thing to do is to set the channel on your transmitter. Here’s what you do:
- Turn the device on by pressing the Pwr/Rst button.
- When you see the red lights start to go on in sequence, simultaneously press and release the “5” and “11” buttons.
- Press the “3” button three times.
You have now set the transmitter to Channel 3. You could have selected any number, I picked three so my description would match the video.
At this point some lights on the transmitter will be blinking. You should see the green LED for button #1 flashing 4 times and then the red LED for button #3 flash once. The four flashing green lights indicate the next shot number in your program that will fire. The single red light flash indicates the channel to which the transmitter is set. At this point the final flash in the sequence should be the red light at button #3. If you do NOT see that single red light flash at button 3, turn the device OFF and repeat the instructions.
If the final light flash in the sequence is a red light at button #3, you’re ready to configure the first receiver.
CONFIGURING RECEIVER #1
1. Unscrew the back panel from the receiver.
2. Turn the channel dial so the “3” lines up with the white indicator line. Some people refer to the dial as a rotary dip switch. It looks like this:

3. Turn ON the receiver and set it to ARM
4. On the transmitter, press ARM ONCE.
When you press either the NEXT FIRE button or buttons 1-6 on the transmitter, the red indicator lights on the receiver will light up.
If the red indicator lights on Receiver #1 go on, you’re ready to configure Receiver #2.
CONFIGURING RECEIVER #2- Unscrew the back panel from the receiver
- Turn the rotary dip switch dial to “E”
- Turn on the receiver
- On the transmitter, press the ARM button ONCE
- On the transmitter, press button “7”
- Turn OFF the transmitter and receiver
- On the receiver, turn the rotary dip switch dial to “3”
TEST THE RECEIVERS
You can now test that you have paired the transmitter to both receivers.
Turn ON and ARM both receivers. Set the receivers in front of you so you can see the blinking green LED light. Turn on the TRANSMITTER and press the NEXT FIRE button.
You should see the red LED for SHOT #1 light up. Pressing the NEXT FIRE button five more times should cause the red LEDs on RECEIVER #1 for shots 2 through 6 to light up.
The next time you press the NEXT FIRE button, it will light up the first red LED on RECEIVER #2. Pressing the NEXT FIRE button five more times will light up the remaining red LEDs in order on RECEIVER #2.
If you’re still having trouble pairing your transmitter to the receivers give us a call at (818) 994-3049.

Leave a comment